
“I expect to wear that blinky bracelet to DefCon”
This has been a very busy busy year even for me.
I won’t get into why, but as a result the BlinkyBracelet project got left behind and I had to apologize to my friend for not producing a cute LED bracelet to wear to DefCon this year. My friend took my apology and decided to make one herself. She told me about a Women who Code event in Portland OR offering to make LED jewelry. This event was, of course, up my alley, so I attended.
Needless to say we were surprised when “LED jewelry” turned into “LED pin” which, to summarise in the best way possible, was felt + conductive thread + coin battery breakout board + LED breakout board + safety pin along with the required tools for craft projects like needle and thread and a glue gun. It was actually a very neat project to introduce a complete noob to hobby electronics. I had a lot of fun talking to the attendants at our table about how electricity works, which side is positive and which side is negative and how to troubleshoot their circuits when they don’t work. A big shout out to Women who Code PDX for hosting these wonderful events.
However, no LED bracelet was to be made here and this left my friend a little disappointed. There was one week before she would leave and I had the power of Amazon Prime. So I decided to try to make something for her that won’t be the esoteric thing that I have been working on but using something more readily available i.e. neopixels.
“That won’t fit me”
The first pressing problem was that I couldn’t find a readily available (read Amazon Prime) bangle that would fit around my friend’s wrist. Mine are in comparison very small. So I found a friend with a 3D printer who agreed to print one out for me. I do not know how to CAD and this posed another problem. Luckily there is the internet and free software. I downloaded FreeCAD and watched this tutorial to get myself started. You can find my finished CAD design files in the main blinkybracelet project as fcstd, fcdtd1. The file that a 3D printer would consume is the stl file.
The process of creating the stl file is rather involved. I followed this manual up to the point of converting the solid CAD design into a mesh and exporting the file as an stl file.
“Let’s go shopping!”
The other things required were the following:
- 1 Adafruit Gemma Prototype Board
- 1 Coin Battery Holder
- 1 RGB Neopixel Strip Note: I bought the one with the black backing which turned out to be surrendipitous as the 3D printing resin my friend used was black.
- Super Glue
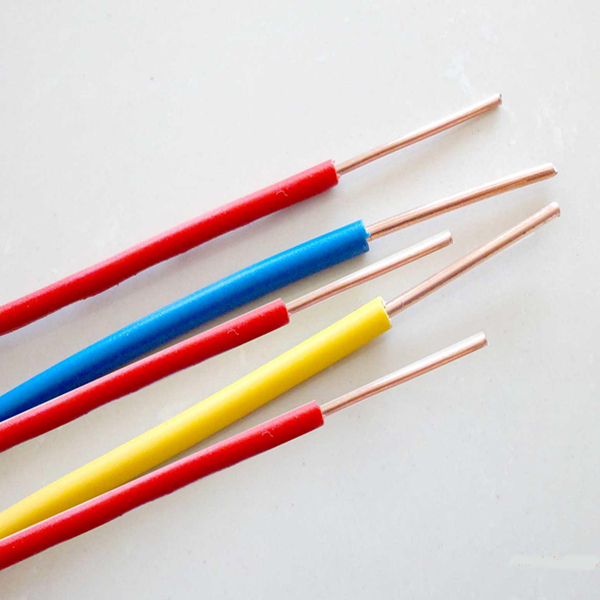
- Random wires…no really, I used whatever wires I had lying around. They ended up being stranded core wires which are a pain to solder on. If you plan on soldering on a non-flat surface, solid core wires make your life a whole lot easier.
A note about my tools and abilities: I have very little soldering experience and so I am not very good at soldering. That said, I still managed to solder, and on a non-flat surface. So I think giving yourself this excuse is a non-starter. Youtube is your friend so find a soldering tutorial already. I also didn’t have some tools. I bought a soldering iron, some lead free solder and some solder wick. I didn’t have any wire strippers so I used my teeth (like any normal person). I cut the wires using my kitchen sissors. What I am trying to say is - I am not a fancy hardware hacker.
“Let’s test it out”
Before putting everything together, I tried to get some blinking lights working on the neopixel strip and the Adafruit Gemma board. Getting the board to work is (surprise!) rather involved. First, I followed Adafruit’s instructions to get my installation of the Arduino IDE to detect the Adafruit Gemma. I am finishing up this blog long after I actually did the installation and I remember my setup being somewhat different from the documentation here but not by much. I still managed to program a blinking light on the board. Next I followed Adafruit’s instructions to install the neopixel libraries. Unlike the board detection, the library installation was easier to follow. I connected the board to the neopixel strip using alligator clips and programmed the board using the IDE, and voila!
A note about the libraries: The libraries are licensed under GPL2.0 which essentially means that if I can use it, but if I were to say sell this bangle for whatever reason, I also need to provide the source code of these libraries. This is simple enough as Adafruit provides a downloadable link to the source code. However, to save some hapless engineer from selling their own version of this bangle (again, for whatever reason), I have not included it in the source code I have published. The commit message hopefully explains this. If not, here it is again:
- Download the zip file from Adafruit’s website here: https://learn.adafruit.com/adafruit-neopixel-uberguide/arduino-library-installation
- Include the libraries within the quickndirty folder
$ git clone https://github.com/nishakm/blinkybracelet.git
$ cd blinkybracelet/quickndirty
$ mkdir libraries
$ cd libraries
$ mv path/to/zip/file .
$ unzip zipfile.zip
At this point I felt that half the battle has been won for me and putting it all together to make it work should be a reasonable thing to accomplish over an evening. Of course I was wrong…
“If I turn back now I am lost”
Initially, I tried a glue gun to attach the battery holder to the bangle but the bangle did not provide a rough enough edge to accomplish this. So I used superglue instead. Next, I needed to find a place for the board. Seeing the readily available flat surface on top of the battery holder, I superglued the board there. Later, I will realize why this was a really bad idea. Maybe you will be able to catch it in the picture :)
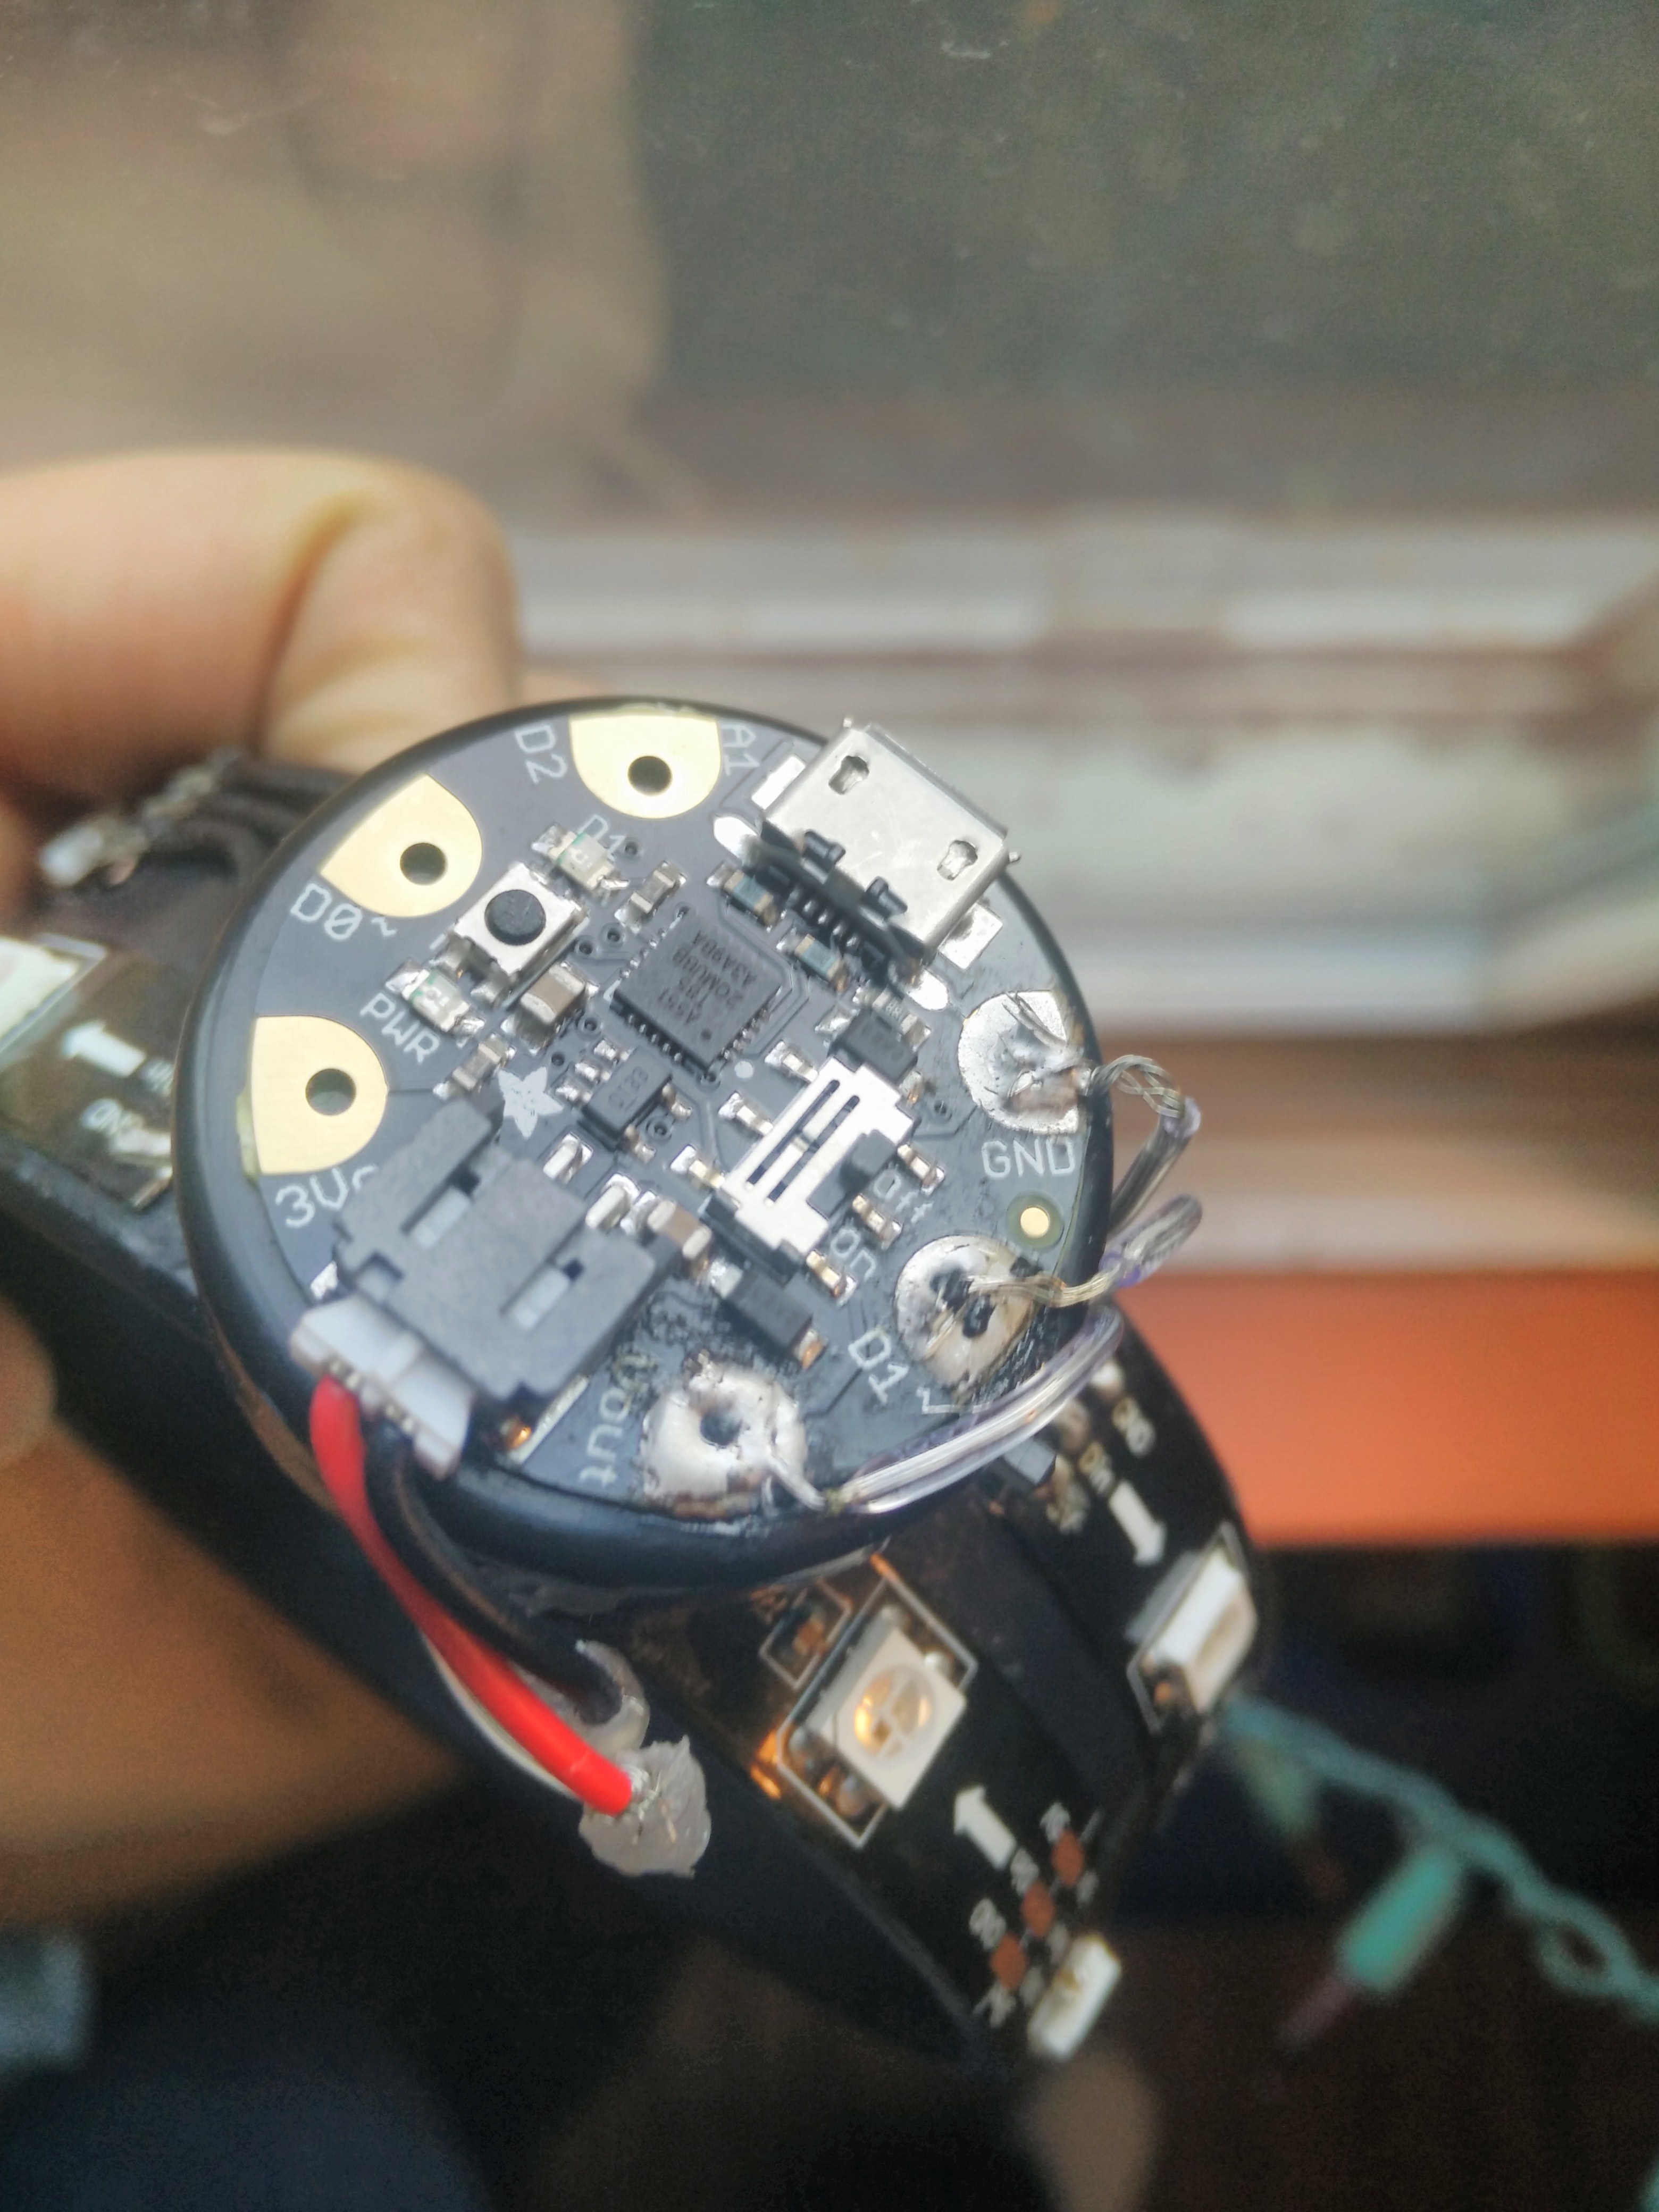
Next, I needed to count off how many neopixels I can fit on the bangle. The bangle is wide enough to hold two strips. The board is only capable of driving one. In order to make two strips fit on the bangle and be driven by one board I cut two strips and joined them together by soldering turned wires. At least, that was the plan. This was, again, not an easy thing to do as the battery holder on the other side got in the way.
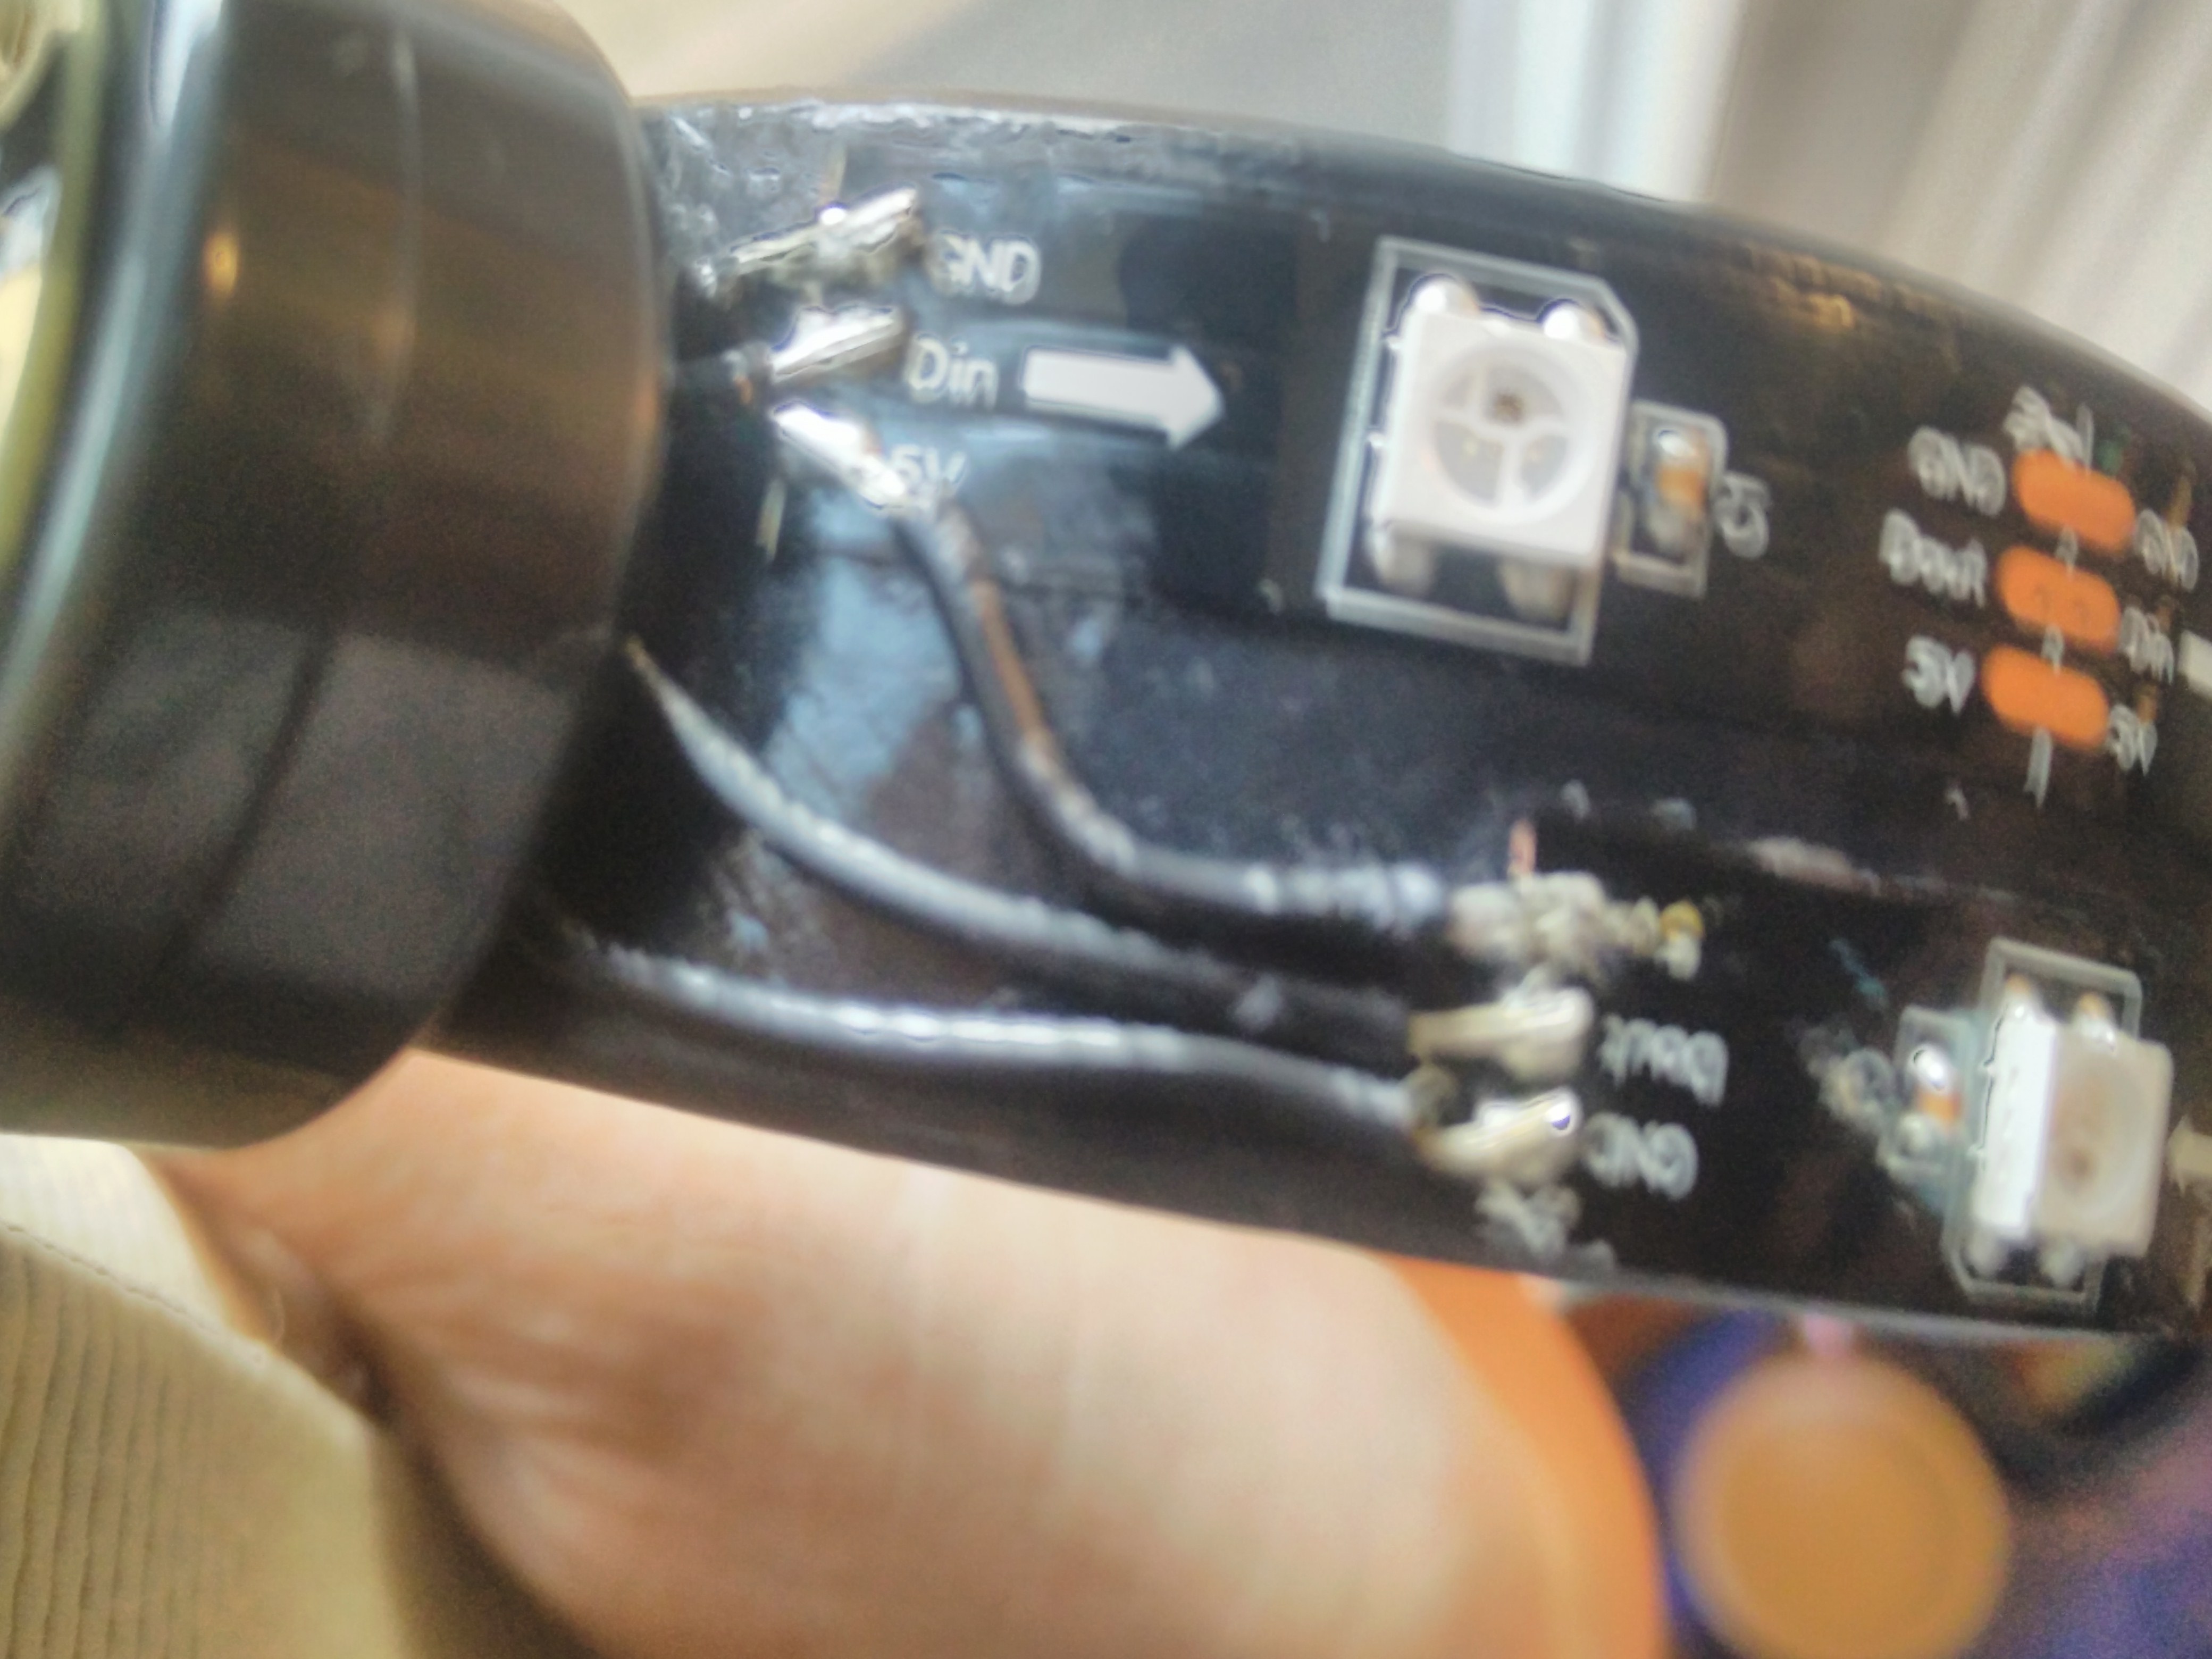
Neopixel strips are easy to connect as you only have to care about 3 pins at the beginning of the strip - the ground, the power and the data pin. The strip shows the direction in which the data flows and so using that as a guide allowed me to (surprisingly) identify the pins I needed to connect by soldering the wires. Now I could connect the bangle to the computer and start programming it.
Programming the neopixels was actually not very difficult. The Adafruit neopixel library only asks for the number of neopixels in your strip (in my case it was 13). The board only allowed for 3 patterns as there was not enough memory for more. Either way, using this set up to complete the programming got me much closer to a finished product.
“I did not think this through…”
Success! The bangle was working with the blinking lights, but it was still powered by the computer. Now I needed it to be powered by the batteries. The coin battery holder I used can hold 2 coin batteries for a total of 6 volts.
Before I get to my epic fail in this project, I would like to point out that I salvaged a JST 2 pin ph connector from a LiPo battery I bought for some purpose and connected it to the coin battery holder. I soldered the wires together and put superglue on them. An ex-coworker taught me how to use shink tape with superglue in order to produce a tight bond between two wires. I didn’t have shrink tape so I just used superglue and hoped for the best. Sloppy, I know, but I am not a hardware hacker and I haven’t yet gotten to the biggest evidence of my sloppiness…
Which is that I cannot insert the batteries as the battery pack screws open rather than pops open. Oh, the humiliation! But I was almost there, so I hoped that the wires would allow me some wiggle room to screw open the battery pack just a little bit and then pop it open the rest of the way. This is, after all, cheap China plastic. I did manage to get a couple of batteries in without breaking the wires open. Magically, the whole thing worked!
Well, not quite. The board ate up wattage fast enough that after a few minutes of running it the rainbow effect only lasted for a couple of seconds.
Much later, I would show this to kids in my neighbourhood school during career day and ask them why the rainbow would glow so brightly when I plugged the thing into a computer and not so much when I ran it only on batteries. The kids guessed why 9 out of 10 times.
“That wasn’t so bad”
I completed the project before my friend left for Defcon 2017 in Las Vegas. I am told that the bangle was received with much admiration and desire at the 503 party. The problem with the wires getting in the way of replacing the batteries was solved by a guy who badly wanted to solder something (I finally got to meet him later in the year. He is a really cool dude!). If you would like to know more about what my friend does, you can follow her on twitter @theDawgCr8
If I had learned anything from this whole exercise, it was that I can actually make the things that are in my head. I already have a few more ideas brewing for next year.
My favorite reward for this effort is that my son’s classmates think I am the “best crafter ever” - definitely worth the trouble.